
テレワークのアクセス回線に使えるWireGuard(サーバ構築)
ブログの初期投稿内容に、WireGuardの構築失敗を載せていたが、1年ぶりに挑戦して、アクセスに成功しました。
そして、AWS上のUbuntuサーバにWireGuardサーバを構築し、ラズパイ上のUbuntuサーバをクライアントにしてVPN通信を確認できた。
さらに、クライアントとして、Windowsパソコン、iPhone、Androidをセットアップして、構成要素の1つとして通信できた。
最終的には、テレワークのためのシステムをSoftEtherVPNを使って、テレワークシステムとして構築して動かしているのだが、これをWireGuardで置き換える目途がたったのだ。
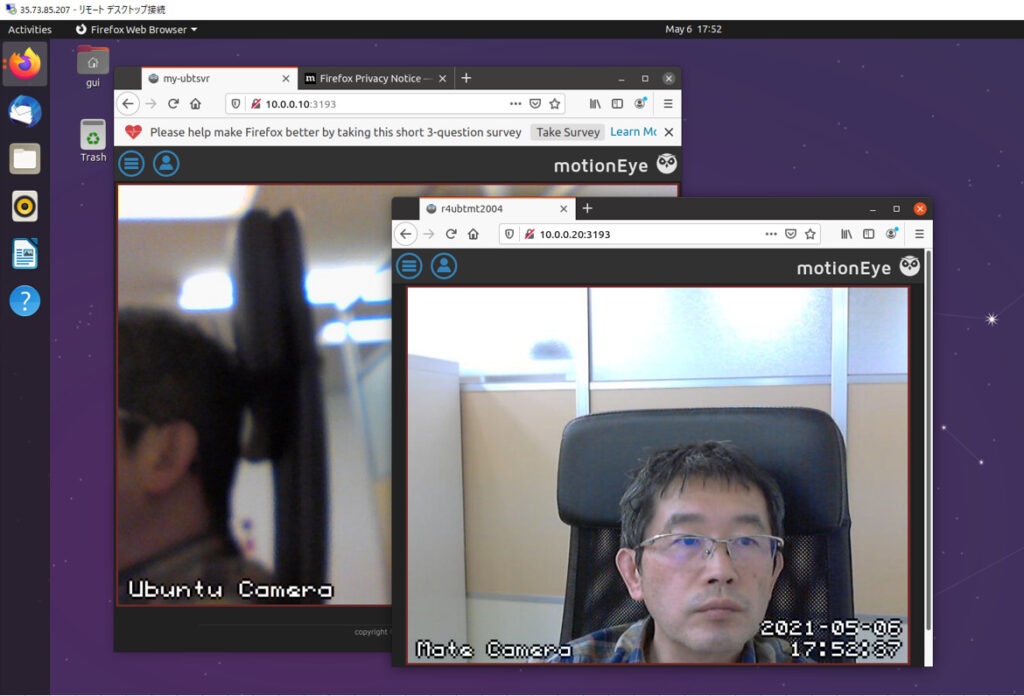
実際にオフィスと私の実家間で、Webカメラシステムとして、脳梗塞を患った母親のモニタもかねて、すでに1年以上稼働しているのだが、WireGuardを使って、SoftEtherで使っているWinパソコン、ラズパイ、モニタシステムを置き換えて、まったく同じ動作をすることができました。
私はAWSアカウントを2つ持っているのですが、片方をメインのテレワークシステムとして動かして、そのバックアップとして、もう1つのAWSを予備としてWireGuardを動かせるようにスタンバイさせておくということができるようになりました。
まず、WireGuardとはどのようなものなのか?
次世代VPNの実装、WireGuard
2019年12月9日、Linuxの生みの親、リーナス・トーバルズによって認められたWireGuardは、Linuxカーネルに統合されました。
WireGuardは既存のVPNプログラムを、ソースコード的にも、構成されている仕組み的にも、管理するための負荷的にも、軽量でセンスの良いモダンな実装になっています。
- 一般的に使われているVPNであるOpenVPNの2倍以上、SoftEtherでは、同等か若干速いかの測定結果となる高速転送が売り
- 拠点間接続を公開鍵暗号をベースとした分かりやすいコンフィグで設定できるので、メンテナンスのし易さが売り
- 最先端技術を積極的に置き変えられる仕組み:鍵共有=Curve25519、暗号化=ChaCha20、データ認証=Poly1305、ハッシュテーブル鍵=SipHash、ハッシュ=BLAKE2s。IPv4及びIPv6の両方に対応し、4in6及び6in4 カプセル化にも対応。
- Linux,Windows,iPhone,Androidのクライアントに対応しており、SoftEtherVPNで構築したテレワークシステムを置き換えられます。
それでは、まずAWS上のUbuntuサーバをWireGuardサーバとして、システム構築をしていきます。
WireGuard インストール
●パッケージの更新とOS最新化
ubuntu@ip-10-21-12-65:~$ sudo apt update
  ・  ・  ・
  ・  ・  ・
  ・  ・  ・
Fetched 4624 kB in 4s (1316 kB/s)
Reading package lists... Done
Building dependency tree
Reading state information... Done
20 packages can be upgraded. Run 'apt list --upgradable' to see them.

ubuntu@ip-10-21-12-65:~$ sudo apt -y upgrade
  ・  ・  ・
  ・  ・  ・
  ・  ・  ・
Found initrd image: /boot/microcode.cpio /boot/initrd.img-5.4.0-1038-aws
Found Ubuntu 20.04.2 LTS (20.04) on /dev/xvda1
done
※ ここで、以前のやり方では、WireGuardのPPAリポジトリの追加を行ったのだが、
いよいよLinuxでの本採用になってきたようで、PPA追加するとエラーとなった。
●WireGuard をインストール
root@ip-10-21-12-65:/home/ubuntu# sudo apt-get install wireguard
Reading package lists... Done
Building dependency tree
Reading state information... Done
The following additional packages will be installed:
  wireguard-tools
Suggested packages:
  openresolv | resolvconf
The following NEW packages will be installed:
  wireguard wireguard-tools
0 upgraded, 2 newly installed, 0 to remove and 0 not upgraded.
Need to get 86.6 kB of archives.
After this operation, 344 kB of additional disk space will be used.
Do you want to continue? [Y/n] y
Get:1 http://ap-northeast-1.ec2.archive.ubuntu.com/ubuntu focal-updates/universe amd64 wireguard-tools amd64 1.0.20200513-1~20.04.2 [83.3 kB]
Get:2 http://ap-northeast-1.ec2.archive.ubuntu.com/ubuntu focal-updates/universe amd64 wireguard all 1.0.20200513-1~20.04.2 [3264 B]
Fetched 86.6 kB in 0s (3314 kB/s)
Selecting previously unselected package wireguard-tools.
(Reading database ... 210669 files and directories currently installed.)
Preparing to unpack .../wireguard-tools_1.0.20200513-1~20.04.2_amd64.deb ...
Unpacking wireguard-tools (1.0.20200513-1~20.04.2) ...
Selecting previously unselected package wireguard.
Preparing to unpack .../wireguard_1.0.20200513-1~20.04.2_all.deb ...
Unpacking wireguard (1.0.20200513-1~20.04.2) ...
Setting up wireguard-tools (1.0.20200513-1~20.04.2) ...
wg-quick.target is a disabled or a static unit, not starting it.
Setting up wireguard (1.0.20200513-1~20.04.2) ...
Processing triggers for man-db (2.9.1-1) ...
● WireGuardのバージョンを確認
root@ip-10-21-12-65:/home/ubuntu# dpkg -l | grep wireguard

ii  wireguard                             1.0.20200513-1~20.04.2              all          fast, modern, secure kernel VPN tunnel (metapackage)
ii  wireguard-tools                       1.0.20200513-1~20.04.2              amd64        fast, modern, secure kernel VPN tunnel (userland utilities)
                       (WireGuardのバージョン)
● WireGuard サーバ設定項目
| セクション名 | 項目名 | 設定内容 | 必須/オプション |
| Interface | PrivateKey ListenPort Address SaveConfig PreUp PostUp PreDown PostDown |
自身の秘密鍵 待ち受けポート番号 WireGuardアドレス 構成の保存設定 構成の保存設定インターフェイスアップ前に実行するスクリプト 構成の保存設定インターフェイスアップ後に実行するスクリプト 構成の保存設定インターフェイスダウン前に実行するスクリプト 構成の保存設定インターフェイスダウン後に実行するスクリプト |
必須 オプション 必須 オプション オプション オプション オプション オプション |
| Peer | PublinKey PresharedKey EndPoint AllowedIPs PersistentKeepAlive |
対向側公開鍵 事前共通鍵 対向側IPアドレス:ポート番号 WireGuard経由で通信するネットワーク NATを保持するためのKeepAlive送信間隔[秒] |
必須 オプション オプション 必須 オプション |
IPアドレス体系
| 機器 | IPアドレス |
| VPNサーバ Ubuntuクライアント スマホクライアント |
10.0.0.1 10.0.0.10-99 10.0.0.100-199 |
● 暗号鍵のキーペアの生成
root@ip-10-21-12-65:/home/ubuntu# cd /etc/wireguard
root@ip-10-21-12-65:/etc/wireguard# umask 077
root@ip-10-21-12-65:/etc/wireguard# wg genkey >privatekey
root@ip-10-21-12-65:/etc/wireguard# ls -la
total 20
drwx------   2 root root  4096 May  5 10:32 .
drwxr-xr-x 147 root root 12288 May  5 10:18 ..
-rw-------   1 root root    45 May  5 10:32 privatekey   ← 秘密鍵生成

root@ip-10-21-12-65:/etc/wireguard# wg pubkey < privatekey > publickey
root@ip-10-21-12-65:/etc/wireguard# ls -la
total 24
drwx------   2 root root  4096 May  5 10:32 .
drwxr-xr-x 147 root root 12288 May  5 10:18 ..
-rw-------   1 root root    45 May  5 10:32 privatekey
-rw-------   1 root root    45 May  5 10:32 publickey   ← 公開鍵生成
● IPv4フォワーディングを有効化( 28STEP目がコメントアウトされる :net.ipv4.ip_forward=1)
root@ip-10-21-12-65:/etc/wireguard# sed -i 's/^#\(net\.ipv4\.ip_forward\)/\1/' /etc/sysctl.d/99-sysctl.conf

	/etc/sysctl.d/99-sysctl.conf

1	#
2	# /etc/sysctl.conf - Configuration file for setting system variables
3	# See /etc/sysctl.d/ for additional system variables.
4	# See sysctl.conf (5) for information.
5	#
6
7	#kernel.domainname = example.com
8
9	# Uncomment the following to stop low-level messages on console
10	#kernel.printk = 3 4 1 3
11
12	##############################################################3
13	# Functions previously found in netbase
14	#
15
16	# Uncomment the next two lines to enable Spoof protection (reverse-path filter)
17	# Turn on Source Address Verification in all interfaces to
18	# prevent some spoofing attacks
19	#net.ipv4.conf.default.rp_filter=1
20	#net.ipv4.conf.all.rp_filter=1
21
22	# Uncomment the next line to enable TCP/IP SYN cookies
23	# See http://lwn.net/Articles/277146/
24	# Note: This may impact IPv6 TCP sessions too
25	#net.ipv4.tcp_syncookies=1
26
27	# Uncomment the next line to enable packet forwarding for IPv4
28	net.ipv4.ip_forward=1
29
30	# Uncomment the next line to enable packet forwarding for IPv6
31	#  Enabling this option disables Stateless Address Autoconfiguration
32	#  based on Router Advertisements for this host
33	#net.ipv6.conf.all.forwarding=1
34
35
36	###################################################################
37	# Additional settings - these settings can improve the network
38	# security of the host and prevent against some network attacks
39	# including spoofing attacks and man in the middle attacks through
40	# redirection. Some network environments, however, require that these
41	# settings are disabled so review and enable them as needed.
42	#
43	# Do not accept ICMP redirects (prevent MITM attacks)
44	#net.ipv4.conf.all.accept_redirects = 0
45	#net.ipv6.conf.all.accept_redirects = 0
46	# _or_
47	# Accept ICMP redirects only for gateways listed in our default
48	# gateway list (enabled by default)
49	# net.ipv4.conf.all.secure_redirects = 1
50	#
51	# Do not send ICMP redirects (we are not a router)
52	#net.ipv4.conf.all.send_redirects = 0
53	#
54	# Do not accept IP source route packets (we are not a router)
55	#net.ipv4.conf.all.accept_source_route = 0
56	#net.ipv6.conf.all.accept_source_route = 0
57	#
58	# Log Martian Packets
59	#net.ipv4.conf.all.log_martians = 1
60	#
61
62	###################################################################
63	# Magic system request Key
64	# 0=disable, 1=enable all, >1 bitmask of sysrq functions
65	# See https://www.kernel.org/doc/html/latest/admin-guide/sysrq.html
66	# for what other values do
67	#kernel.sysrq=438
● WireGuard 設定ファイル生成
root@ip-10-0-88-188:/etc/wireguard# vi /etc/wireguard/wg0.conf

[Interface]
Address = 10.0.0.1/24
ListenPort = 51820
PrivateKey = (privatekeyファイルの内容)
PostUp = iptables -A FORWARD -i %i -j ACCEPT;iptables -t nat -A POSTROUTING -o eth0 -j MASQUERADE
PostDown = iptables -D FORWARD -i %i -j ACCEPT;iptables -t nat -D POSTROUTING -o eth0 -j MASQUERADE
WireGuardのサーバー設定には「PostUp」「PostDown」という項目があり、インターフェイスの起動/終了時に任意のコマンドを実行させることができます。
ここにiptablesコマンドを指定して、インターフェイスが起動している間だけ、iptablesにIPマスカレードの設定を追加するようにします。
root@ip-10-21-12-65:/etc/wireguard# sudo iptables -L -n -t nat (起動前)
Chain PREROUTING (policy ACCEPT)
target     prot opt source               destination

Chain INPUT (policy ACCEPT)
target     prot opt source               destination

Chain OUTPUT (policy ACCEPT)
target     prot opt source               destination

Chain POSTROUTING (policy ACCEPT)            ←定義なし
target     prot opt source               destination

root@ip-10-0-88-188:/home/ubuntu# sudo iptables -L -n -t nat (起動後)

Chain PREROUTING (policy ACCEPT)
target     prot opt source               destination

Chain INPUT (policy ACCEPT)
target     prot opt source               destination

Chain OUTPUT (policy ACCEPT)
target     prot opt source               destination

Chain POSTROUTING (policy ACCEPT)            ←iptablesのPOSTROUTINGチェインにルールが追加される
target     prot opt source               destination
MASQUERADE  all  --  0.0.0.0/0            0.0.0.0/0
● WireGuard サーバを起動
root@ip-10-21-12-65:/etc/wireguard# wg-quick up wg0

[#] ip link add wg0 type wireguard
[#] wg setconf wg0 /dev/fd/63
[#] ip -4 address add 10.0.0.1/24 dev wg0   ←サーバIPアドレス確認
[#] ip link set mtu 8921 up dev wg0
[#] iptables -A FORWARD -i wg0 -j ACCEPT;iptables -t nat -A POSTROUTING -o eth0 -j MASQUERADE

root@ip-10-21-12-65:/etc/wireguard# ip addr show dev wg0   ※ WireGuardが利用するwg0インターフェイスを確認

3: wg0: <POINTOPOINT,NOARP,UP,LOWER_UP> mtu 8921 qdisc noqueue state UNKNOWN group default qlen 1000
    link/none
    inet 10.0.0.1/24 scope global wg0
       valid_lft forever preferred_lft forever

root@ip-10-21-12-65:/etc/wireguard# wg  ※ WireGuardの稼働状態

interface: wg0
  public key: (サーバの公開鍵)
  private key: (hidden)
  listening port: 51820

root@ip-10-21-12-65:/etc/wireguard# wg  ※ WireGuardクライアントの設定完了後の稼働状態

interface: wg0
  public key: FHFR3FIpUrh/+0fHNnhfBqiQOouKvmYs8V/MCuHhlHc=
  private key: (hidden)
  listening port: 51820

peer: eRaxN7qZFEukAnZpU82xdN+vXTlqBo9eRHbm0UcKqAQ=
  allowed ips: 10.0.0.10/32
● WireGuard サーバを停止して、rootユーザからログアウト
root@ip-10-21-12-65:/etc/wireguard# wg-quick down wg0

[#] ip link delete dev wg0
[#] iptables -D FORWARD -i wg0 -j ACCEPT;iptables -t nat -D POSTROUTING -o eth0 -j MASQUERADE

root@ip-10-21-12-65:/etc/wireguard# exit
exit
ubuntu@ip-10-0-88-188:~$
● Amazon Web Services の SecurityGroup で、インバウンドのUDPポート:51820 を許可しておく
WireGuardの起動や終了に、wg-quickというラッパースクリプトを使用します。
systemdのユニット名は、「wg-quick@使用するインターフェイス名」です。
sytemctlコマンドで有効化します。
ubuntu@ip-10-21-12-65:~$ sudo systemctl enable wg-quick@wg0
Created symlink /etc/systemd/system/multi-user.target.wants/wg-quick@wg0.service → /lib/systemd/system/wg-quick@.service.
ubuntu@ip-10-21-12-65:~$ sudo systemctl start wg-quick@wg0

ubuntu@ip-10-21-12-65:~$ ip addr show dev wg0

4: wg0: <POINTOPOINT,NOARP,UP,LOWER_UP> mtu 8921 qdisc noqueue state UNKNOWN group default qlen 1000
    link/none
    inet 10.0.0.1/24 scope global wg0
       valid_lft forever preferred_lft forever
● WireGuard サーバでのルーティングを許可する
Ubuntuデフォルトで、パケットのフォワードが禁止されています。
サーバーの「/etc/sysctl.conf」のコメントアウトされている「net.ipv4.ip_forward=1」
を生かします。
ubuntu@ip-10-21-12-65:~$ vi /etc/sysctl.conf

28 net.ipv4.ip_forward=1
sysctlコマンドを実行し,変更を反映
root@ip-10-21-12-65:/home/ubuntu# sudo sysctl -p
net.ipv4.ip_forward = 1
WireGuard サーバに、GUI・デスクトップ環境をつくる
サーバで作成したコンフィグを、クライアントのラズパイで指定しなければならないが、
QRコードをサーバで表示して、クライアントで読み込むのが一番、簡単。
ただし、そのためには、AWS上のUbuntuでGUI画面を出さなくてはならない。
ミソはt2.micro では固まってしまうので、最低でもインスタンスは、t3a.small を選ばなければならない。
●デスクトップ用ユーザーの作成(gui)
ubuntu@ip-10-21-12-65:~$ sudo adduser gui

Adding user `gui' ...
Adding new group `gui' (1001) ...
Adding new user `gui' (1001) with group `gui' ...
Creating home directory `/home/gui' ...
Copying files from `/etc/skel' ...
New password:
Retype new password:
passwd: password updated successfully
Changing the user information for gui
Enter the new value, or press ENTER for the default
Full Name []: 	  ← Enterを入力
Room Number []: 	 ← Enterを入力
Work Phone []: 	  ← Enterを入力
Home Phone []: 	  ← Enterを入力
Other []: 	    ← Enterを入力
Is the information correct? [Y/n] y  ← Yを入力
●デスクトップ用ユーザーをsudoグループへ追加
ubuntu@ip-10-21-12-65:~$ sudo gpasswd -a gui sudo

Adding user gui to group sudo
●デスクトップ環境のインストール
ubuntu@ip-10-21-12-65:~$ sudo apt -y install ubuntu-desktop

Reading package lists... 0%Reading package lists... 100%Reading package lists... Done
Building dependency tree... 0%Building dependency tree... 0%Building dependency tree... 50%Building dependency tree... 50%Building dependency tree
Reading state information... 0%Reading state information... 0%Reading state information... Done
The following additional packages will be installed:
  aisleriot app-install-data-partner apt-config-icons-hidpi baobab branding-ubuntu cheese deja-dup duplicity eog evince evince-common file-roller
  fonts-noto-color-emoji gamemode gedit gedit-common gir1.2-dee-1.0 gir1.2-gtksource-4 gir1.2-gudev-1.0 gir1.2-peas-1.0 gir1.2-rb-3.0 gir1.2-totem-1.0
  gir1.2-totemplparser-1.0 gir1.2-udisks-2.0 gir1.2-unity-5.0 gnome-calculator gnome-calendar gnome-characters gnome-disk-utility
  :  :  :
  :  :  :
Setting up nautilus-share (0.7.3-2ubuntu3) ...
Setting up ubuntu-desktop (1.450.2) ...
Processing triggers for initramfs-tools (0.136ubuntu6.4) ...
update-initramfs: Generating /boot/initrd.img-5.4.0-1047-aws
Processing triggers for libc-bin (2.31-0ubuntu9.2) ...
ubuntu@ip-10-21-12-65:~$
●XRDPのインストール
ubuntu@ip-10-21-12-65:~$ sudo apt install -y xrdp

Reading package lists... Done
Building dependency tree
Reading state information... Done
The following additional packages will be installed:
  xorgxrdp
Suggested packages:
  guacamole xrdp-pulseaudio-installer
The following NEW packages will be installed:
  xorgxrdp xrdp
0 upgraded, 2 newly installed, 0 to remove and 0 not upgraded.
Need to get 488 kB of archives.
After this operation, 3212 kB of additional disk space will be used.
Get:1 http://ap-northeast-1.ec2.archive.ubuntu.com/ubuntu focal/universe amd64 xrdp amd64 0.9.12-1 [428 kB]
Get:2 http://ap-northeast-1.ec2.archive.ubuntu.com/ubuntu focal/universe amd64 xorgxrdp amd64 1:0.2.12-1 [59.9 kB]
Fetched 488 kB in 0s (14.4 MB/s)
Selecting previously unselected package xrdp.
(Reading database ... 236685 files and directories currently installed.)
Preparing to unpack .../xrdp_0.9.12-1_amd64.deb ...
Unpacking xrdp (0.9.12-1) ...
Selecting previously unselected package xorgxrdp.
Preparing to unpack .../xorgxrdp_1%3a0.2.12-1_amd64.deb ...
Unpacking xorgxrdp (1:0.2.12-1) ...
Setting up xrdp (0.9.12-1) ...

Generating 2048 bit rsa key...

ssl_gen_key_xrdp1 ok

saving to /etc/xrdp/rsakeys.ini

Created symlink /etc/systemd/system/multi-user.target.wants/xrdp-sesman.service → /lib/systemd/system/xrdp-sesman.service.
Created symlink /etc/systemd/system/multi-user.target.wants/xrdp.service → /lib/systemd/system/xrdp.service.
Setting up xorgxrdp (1:0.2.12-1) ...
Processing triggers for systemd (245.4-4ubuntu3.6) ...
Processing triggers for man-db (2.9.1-1) ...
Processing triggers for libc-bin (2.31-0ubuntu9.2) ...
●new_cursorsの無効化
ubuntu@ip-10-21-12-65:~$ sudo sed -e 's/^new_cursors=true/new_cursors=false/g' -i /etc/xrdp/xrdp.ini●xrdpサービスの再起動、有効化
ubuntu@ip-10-21-12-65:~$ sudo systemctl restart xrdp
ubuntu@ip-10-21-12-65:~$ sudo systemctl enable xrdp.service
Synchronizing state of xrdp.service with SysV service script with /lib/systemd/systemd-sysv-install.
Executing: /lib/systemd/systemd-sysv-install enable xrdp
ubuntu@ip-10-21-12-65:~$ sudo systemctl enable xrdp-sesman.service
ubuntu@ip-10-21-12-65:~$ systemctl list-unit-files -t service | grep xrdp
xrdp-sesman.service                            enabled         enabled
xrdp.service                                   enabled         enabled
●xsessionファイルの作成
ubuntu@ip-10-21-12-65:~$ su gui
Password:
To run a command as administrator (user "root"), use "sudo <command>".
See "man sudo_root" for details.

gui@ip-10-21-12-65:/home/ubuntu$ cd ~
gui@ip-10-21-12-65:~$ DESKTOP=/usr/share/ubuntu:/usr/local/share:/usr/share:/var/lib/snapd/desktop
gui@ip-10-21-12-65:~$ cat <<EOF > ~/.xsessionrc
> export GNOME_SHELL_SESSION_MODE=ubuntu
> export XDG_CURRENT_DESKTOP=ubuntu:GNOME
> export XDG_DATA_DIRS=${DESKTOP}
> export XDG_CONFIG_DIRS=/etc/xdg/xdg-ubuntu:/etc/xdg
> EOF
●Authentication Requiredダイアログの回避
gui@ip-10-21-12-65:~$ cat <<EOF | sudo tee /etc/polkit-1/localauthority/50-local.d/xrdp-color-manager.pkla

> [Netowrkmanager]
> Identity=unix-user:*
> Action=org.freedesktop.color-manager.create-device
> ResultAny=no
> ResultInactive=no
> ResultActive=yes
> EOF
[sudo] password for gui:
[Netowrkmanager]
Identity=unix-user:*
Action=org.freedesktop.color-manager.create-device
ResultAny=no
ResultInactive=no
ResultActive=yes

gui@ip-10-21-12-65:~$ sudo systemctl restart polkit
gui@ip-10-21-12-65:~$ exit
exit
●リモートデスクトップ接続のために、セキュリティグループで、TCPポート3389を許可する
t2.micro では固まってしまったので、AMIから t3a.small を選んで起動したら、Windowsリモートディスクトップが接続できた。
WireGuardをやっと実装できたが、なんのことはない、ネゴシエーションで使うポートを、インバウンドのUDPポート:51820 で許可しておくところをTCPで定義してしまっていただけであった。
でも案外Web上の情報で書いていなくて、気が付くのに時間がかかった。
また、その後ではまったのが、WireGuardの要は公開鍵認証でコンフィグを定義するところだが、その鍵種類を間違えていた。
つまり、単なるチョンボだけでした。
実際の運用に関しては、「SoftEtherVPNよりもWireGuardの方が早いかも」との評価も目にするが、評判通り通信が軽い気がした。
あくまでも、操作のフィーリングであるのですが。
また、SoftEtherでスマホからモニタするためには、L2TP/IPsecを動かさなければならないが、WireGuardの場合にはWin,Linuxと設定に違いが表れてこない。この辺も設定を簡潔に設計されている所以だと思った。
ただし、Wireguardは設定を固定的に固めれば、後は設定の変更もなく、堅牢に動いてくれるのがメリットとなるのだろうが、(最近までお試しソフトでしたが)SoftEtherはサーバ管理ツールやクライアント管理ツールが充実していて、認証もパスワード認証からWindowsのAD認証、RADIUS認証まであり、通信のベースにブリッジ接続を柔軟に変更できたり、セキュアNATのような先進的技術もあったりするので、そもそもネットワークデザイン自体をやろうとおもったら、変更できるほどの高機能がうりなので、そこんとこでメインはSoftEtherなのでした。